Painting Kaelyssa
Hi folks, this is my first (and possibly last, we’ll see) post about painting. I’m not a good painter, and my models don’t end up looking great, but I thought it might be interesting to document what happens when normal folks paint (It solves two more purposes too - hopefully better painters than me (everyone) can give me tips, and documenting what I’m doing gives me a chance of replicating the scheme later). I recently bought the Retribution of Scyrah Battlegroup, and the first model I’m looking at is Warcaster Kaelyssa, Night’s Whisper. I haven’t done any painting in a while (over a year, I think), I haven’t tried this scheme on a tester model, and I’m writing this post as I go along, so I’ve no idea how it’s going to turn out. We can probably be confident that my photos won’t be the greatest, though - sorry about that.
Assembling
The only assembly I initially did was to cut a line across one of the MDP Rocky Terrain bases, trim the tab on Kaelyssa a bit, glue that in place and liquid green stuff (which, at a few years old, was considerably less liquid than would have been convenient - time to buy more) in the holes. I didn’t bother sticking the cloak on as (after checking that the fit looked good without green stuff) it seemed I’d be able to glue this in place after painting fairly painlessly, and let me have better access to her back.

Undercoating
It was late and wet when I wanted to start on her, so I couldn’t go outside to spray an undercoat on. Instead I used a greyish mix of some slightly watered-down black Liquitex Gesso and Vallejo Dead White. I don’t like the result of this anything like as much as I like sprayed models, but on plastics it seems tolerable (it’s far too flaky on metals).
The cloak
The first paint I applied was to cover the cloak in some old Citadel Foundations Orkhide Shade I had (using old painting materials that I should probably have binned years ago is a pattern).
Base colours on Kaelyssa
I think I may have chosen poorly starting with Kaelyssa; with all the different types of material on her (the Ret armour, some other hard armour, cloak, leathers etc) I’ve now realised it’s making life difficult for myself on my first Ret model. Should have gone with a light Myrmidon - oh well.
It’s time to lay the base colour on the various bits of the model. I’m going with an off-white grey theme for the army (I’m not a good painter, I have no hope of white), so I’ll basecoat the armours with P3 Charcoal Grey. Some old Citadel Foundation Tallarn Flesh will do for the skin, and some Citadel Base Steel Legion Drab for the leathers. I decided to go with blue hair instead of the green of the studio colours, so used the Citadel Base Kantor Blue. The base I coated with P3 Battlefield Brown for the muddy bits, and P3 Charcoal Grey for the stony bits. As I applied each colour (going from inner layers to outer layers) I tried to overlap the surrounding higher areas at the edges so I wasn’t left with bits of undercoat showing; I’ve not decided yet if this is good, or if I should just try to be neat.
Just for reference, the order I did this was:
- Face (Tallarn Flesh)
- Leather (Steel Legion Drab)
- Base, Muddy bits (Battlefield Brown)
- Base, Stony bits (Charcoal Grey)
- Everything on Kaelyssa other than the hair and cloak wrap (Charcoal Grey)
- Hair (Kantor Blue)
- Cloak wrap (Orkhide Shade)
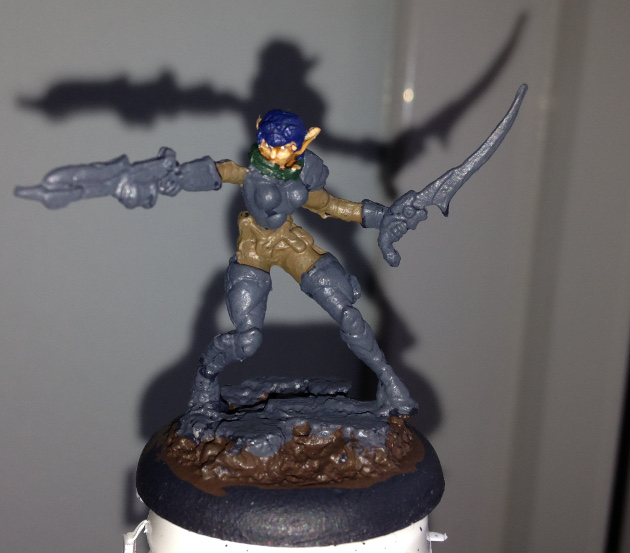
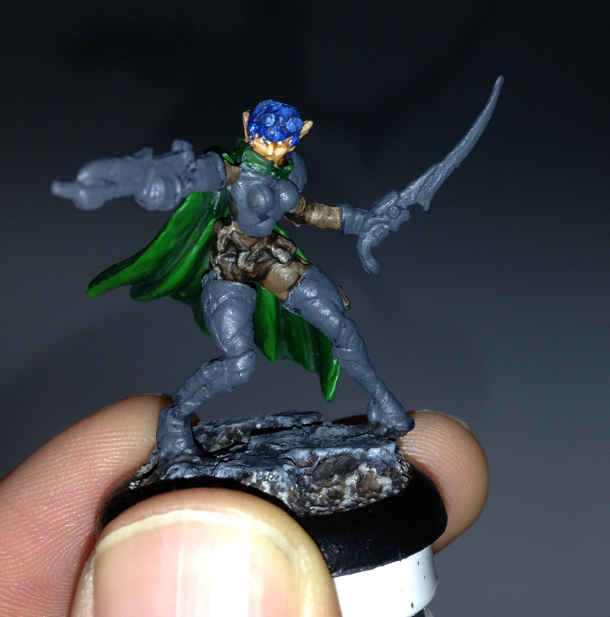
So here we go - Kaelyssa with the base colours down. It looks horribly ugly at this stage, like a child with crayons has been at it, plus the Legion Drab leather came out much lighter than I remembered. I’m hoping this’ll start to rectify itself with some layering and washing later.
Face
As a) the most deeply recessed bit of the model, and b) the bit I’m most likely to mess up and want to go back to fix, I’m trying to get the face done next. First job here is to raise almost everything to Citadel Layer Kislev Flesh. I then applied a liberal amount of the old Citadel Wash Gryphonne Sepia and waited an age for that to dry.
Before bringing the flesh tone back up it’s time to work out what to do about the eyes. These ones are really tiny and the odds of me ending up with something I’m happy with here are remote. First a tiny amount of P3 Menoth White Highlight drawn sideways across for the whites and then a dot of Charcoal Grey for the pupil. Lastly I can lightly hightlight the edges of the cheeks, eyebrows and ears with Kislev Flesh again.
Well, that’s not going to win any prizes, but it’s about as good as my faces ever get. I’ll have to touch up the flesh I got onto the scarf and the hair in a moment.
Hair
I seem to be in the general head area, so I may as well finish off the hair while I’m up here. Some P3 Cygnar Blue Highlight first, applied almost everywhere, just leaving a bit of the base showing. A drybrush (much heavier than I intended) of Citadel Layer Hoeth Blue comes next, and then a drybrush of Citadel Dry Etherium Blue. I had to be moderately careful trying to drybrush such a small space - my hand isn’t that steady. This was a bit of a disaster anyway; I’d forgotten how chalky the Citadel Dry paints look, so a watered down Citadel Wash Asurmen Blue to try and take the edge off a bit (which, thankfully, worked).
I’ll come back to finish off the rest of the head (the goggles) later
Base
For no good reason other than it’s big, involves drybrushing and I don’t want to have to be careful, I’ll do the base next. This isn’t very interesting - I did a heavy drybrush (much heavier than I intended) of Steel Legion Drab over the mud, then a lighter drybrush of Citadel Layer Baneblade Brown. a wash of Citadel Wash Devlan Mud over all of the base (stone and mud), then a very light drybrush of P3 White Menoth Base over the mud. To finish off the stone, a drybrush of Citadel Layer Dawnstone, and a very light drybrush of Citadel Layer Administratum Grey at the edges. Touching up the rim with some Citadel Chaos Black, and then facing markers with Citadel Layer Sotek Green and that’s the base painted.
Leather
(Mostly) ignoring the obvious Tori Amos reference, next up is the leather. I’ll wash this in a moment, so first up is to put the detail (bags etc.) in; I’ll do this with Citadel Base Rhinox Hide.
And with that done I’m immediately regretting the Rhinox Hide; it’s much darker than I hoped. Oh well, time to raise it up a bit. For this, I’ll spread around some Citadel Layer Gorthor Brown pretty much all over the leather details. P3 Menoth White Base for a drybrush over all the leather next, and this went awfully - nothing coming off on the tissue, but almost flooding off the brush onto the model; paints hate me. Hopefully Citadel Wash Devlan Mud will save me.
Nope, didn’t save me at all - I’ve no longer got any distinction between the leather trousers and the detail. I’m annoyed with this now, so will leave it and see how everything works out at the end.
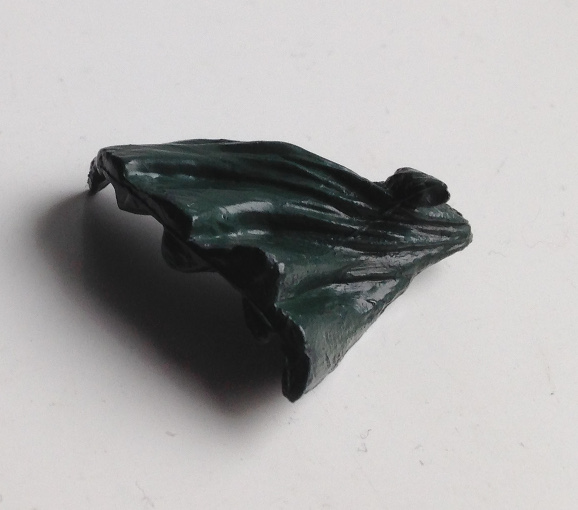
Cloak
After the leather disaster, let’s see if I can destroy the cloak. I seem to rather foolishly have a dearth of green paints, so this could end up interestingly.
Lemony-fresh victory for Zim! After some hunting I found some old Citadel Dark Angels Green. I’ll apply that everywhere but the recesses of the cloak.
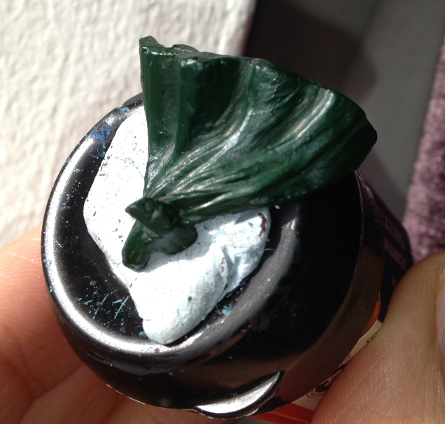
The light really isn’t helpful for taking photos at the moment, so it just looks like a green blob. Oh well. Now I’ll start mixing some Citadel Snot Green (lovely) in with the Dark Angels Green and build up the highlights a bit.
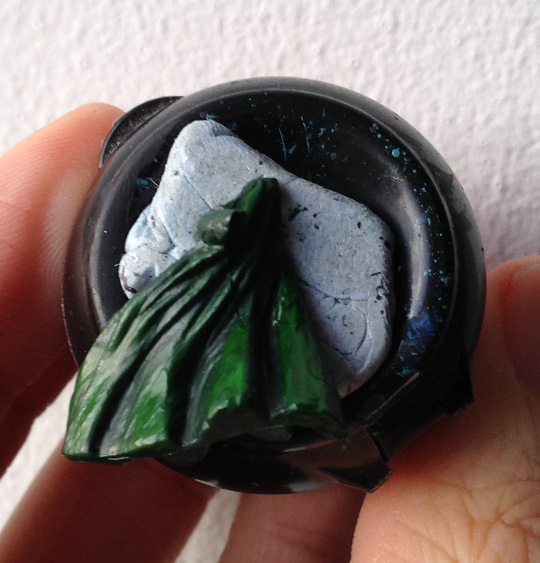
I’ve been mixing in the Snot Green with the Dark Angels Green and a bit of Vallejo Thinner Medium. Next I’ll add some Citadel Goblin Green into that mix and try layering some of that on, and bring it up to a pure (but very thinned) Goblin Green for the tips. The Goblin Green seems to be very old (one of the old Citadel black screw tops), so this may not go well; I should buy some newer paints.
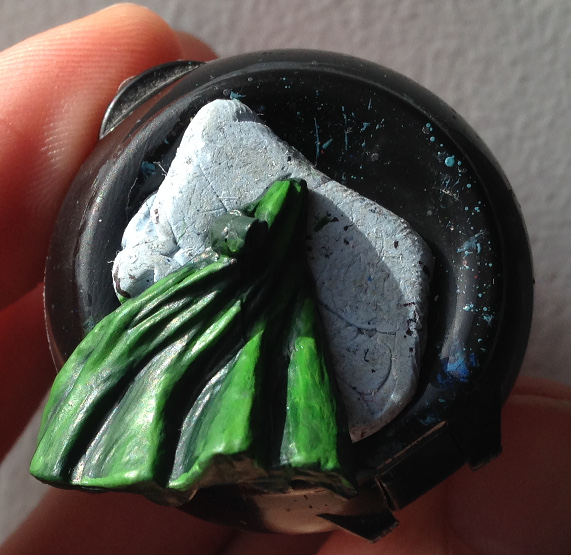
After drawing a brush with just thinner medium on it across the boundaries to try and blend them in a little (yes, I know that’s not how one should blend!), I end up with a cloak. Not great but not too terrible, which is about as good as I can hope for with my painting skills (or lack thereof). This seems like a good point to pop the cloak on the back (without gluing) and see what it looks like all together.
Answer: Not too bad, considering.
Grey
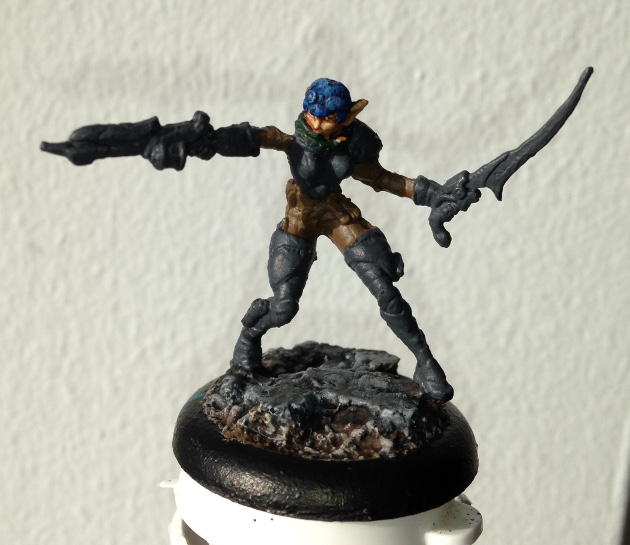
Now onto the bit I’ve been dreading. I can put this off a bit, though, by washing all the grey bits with Citadel Badab Black. So I’m going to do exactly that.
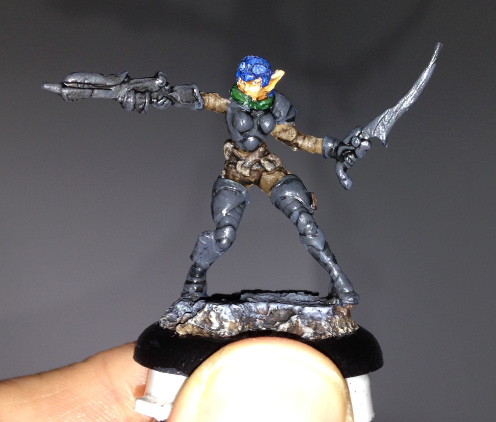
A black wash seems to instantly make greys look much better. Now I need to work out what’s happening next, and how light I want to try to make this grey armour. If I was a better painter, I’d try for white, so I think that implies I should go for as light a grey as I can manage. Citadel Layer Dawnstone might be too dark for this, but I wasn’t smart enough to paint a tester first so I’ll have to experiment here; my next step will be Dawnstone in all but the recesses.
It’s not until I see te photo with a cruel flash that I realise just how messy my highlighting has been; I wonder if this’ll be easier or harder when it comes time to paint the myrmidons. A bit upsetting, but time to move on - this time with a coat of Citadel Layer Administratum Grey. I want to bring up the armour a lot closer to white before it’s done, so this is another fairly broadly-applied layer.
I worked out halfway through applying the Administratum Grey that it was too thick, and started to mix it with Medium Thinner. This is where I’m really regretting not going with my usual policy of drybrushing everything - these armour plates are horrendously messy, and I suspect it’s only going to get worse as I now start mixing drops of Vallejo Dead White into the Administratum Grey mix.

I can’t really judge how well it’s going at this point. There’s a layer of (mostly) Administratum Grey with some Medium and a couple of drops of Vallejo Dead White, then a smaller highlight of the same mix, but this time mostly Dead White.
The mix this time was pretty much just thinned Dead White, and was applied only to the edges. That’s the armour done, and I can’t say I’m very happy with it. I should have tried a test model for this theme instead of jumping straight in with my caster and trying techniques (layering rather than drybrushing) that I know I’m not great with. Oh well.
Finishing off
Accepting that there’s nothing much I can do about the white/grey at this point other than stripping and starting again, I’ll finish off the bits of detail I’ve left up to this point. Heavy drybrush of Administratum Grey on the sword, followed by a light green glaze (Citadel Washes Thrakka Green). Adding brown straps (P3 Bloodstone) to the goggles, and Sotek Green lenses. The gun I drybrushed Citadel Dry Terminatus Stone, and washed with Devlan Mud.
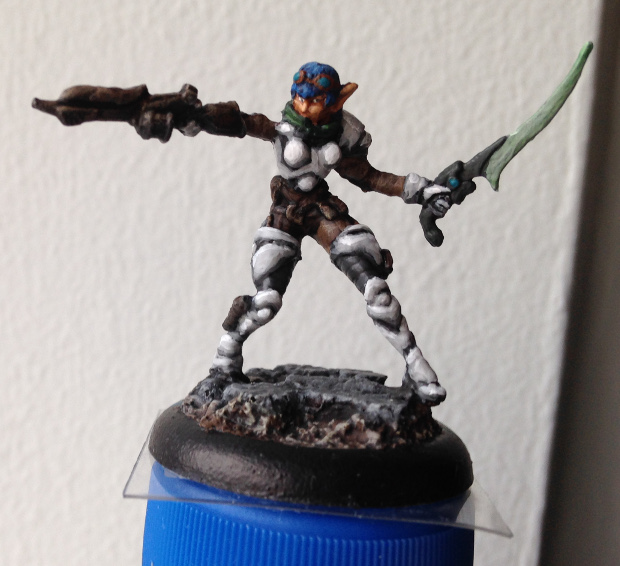
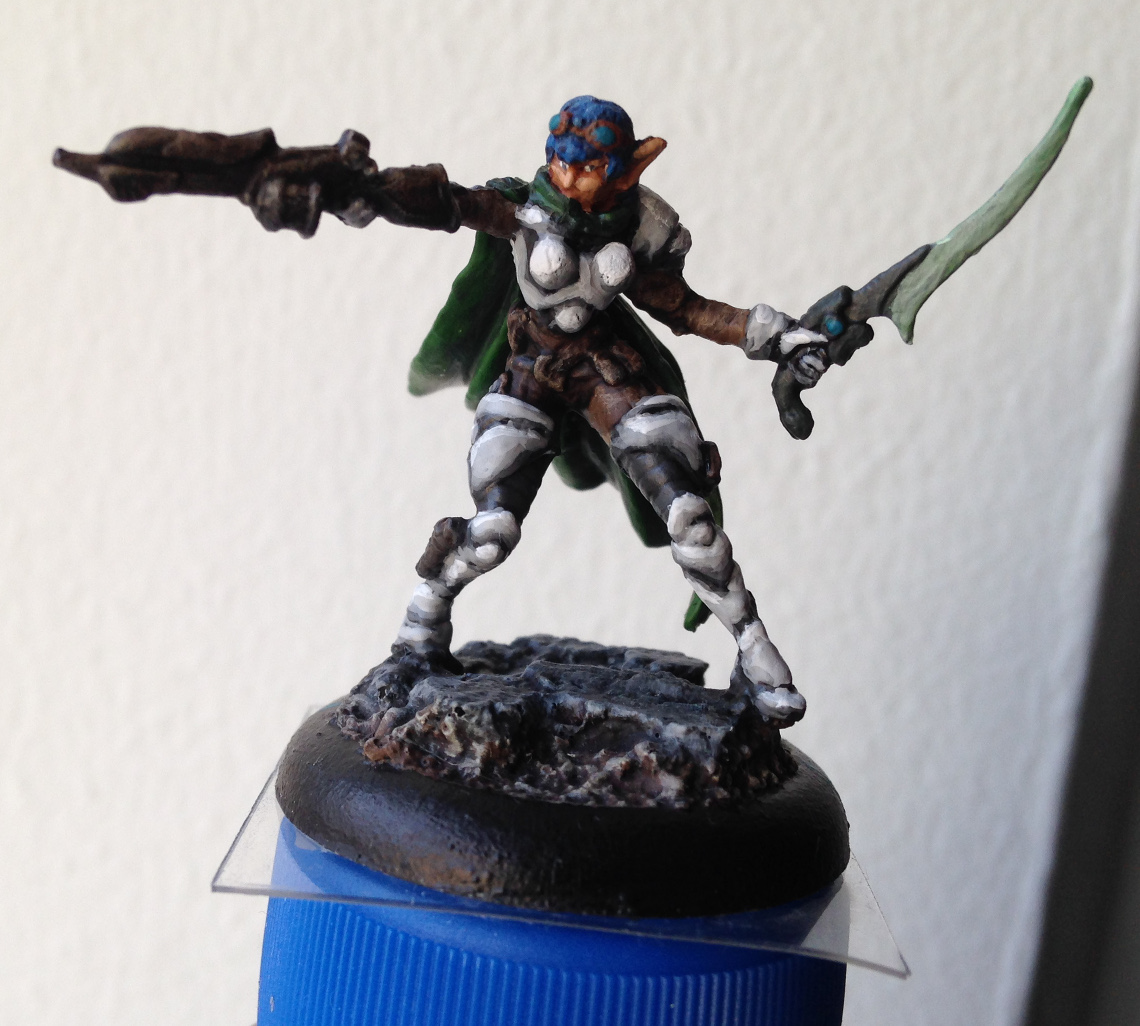
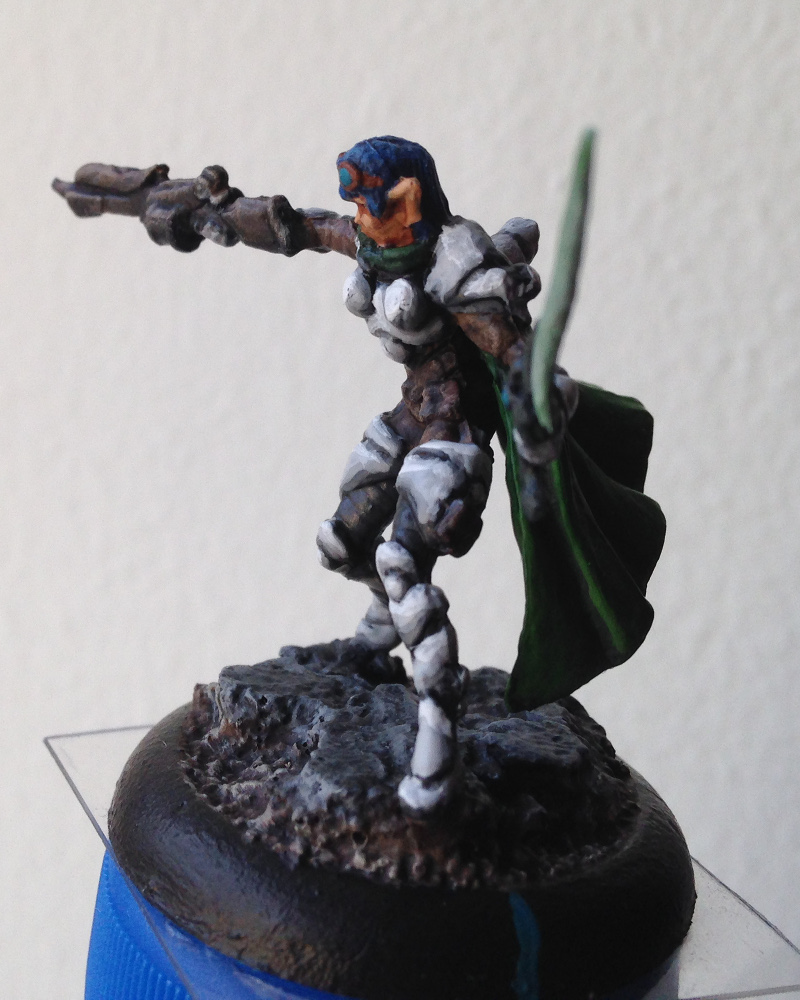
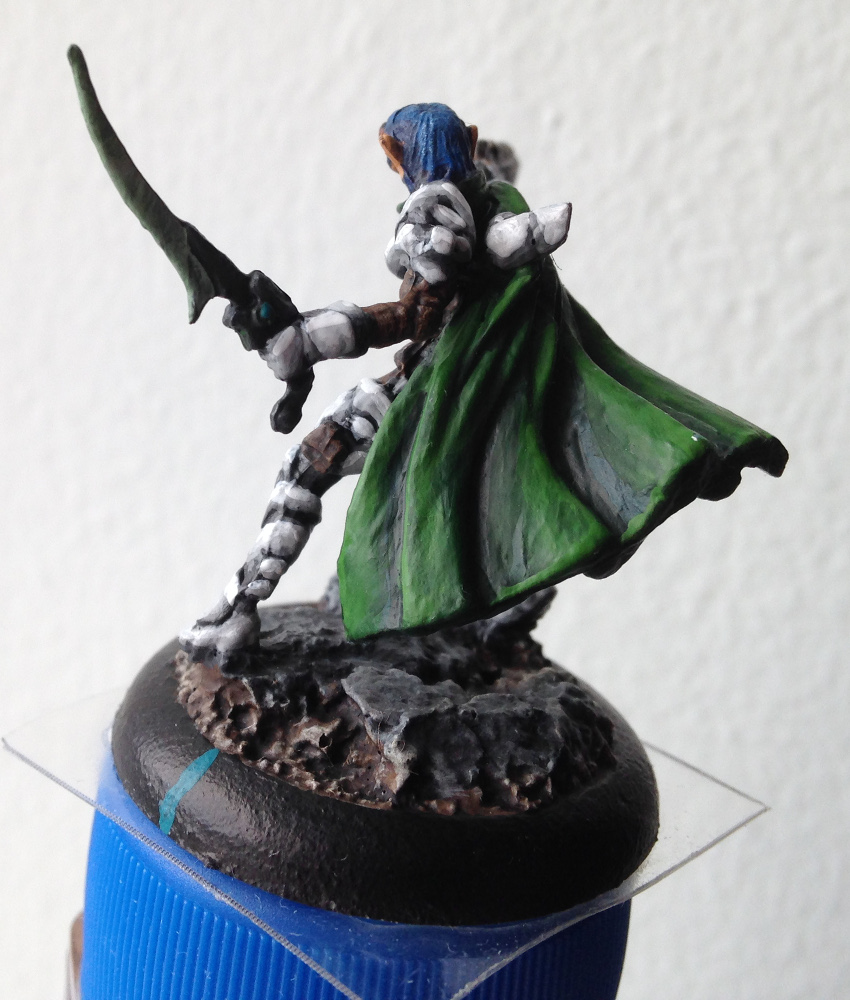
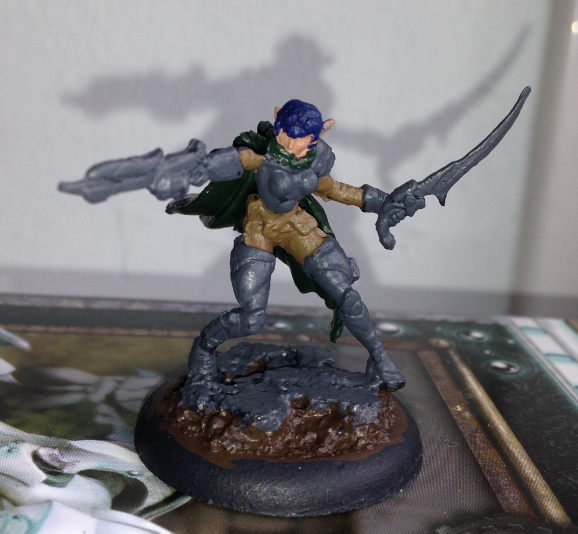
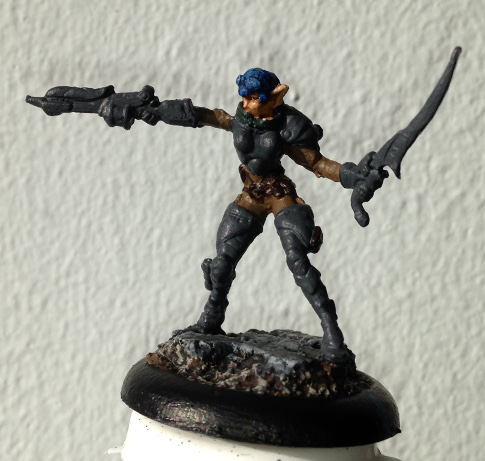
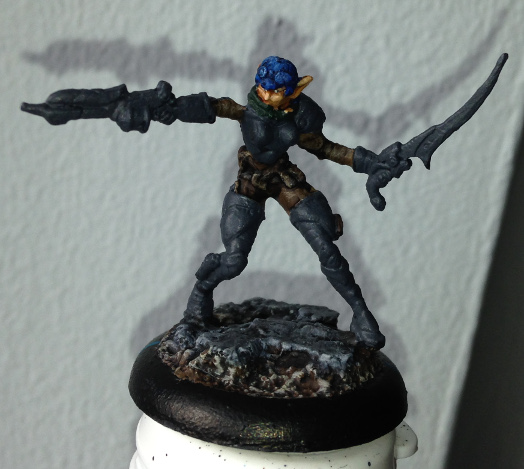
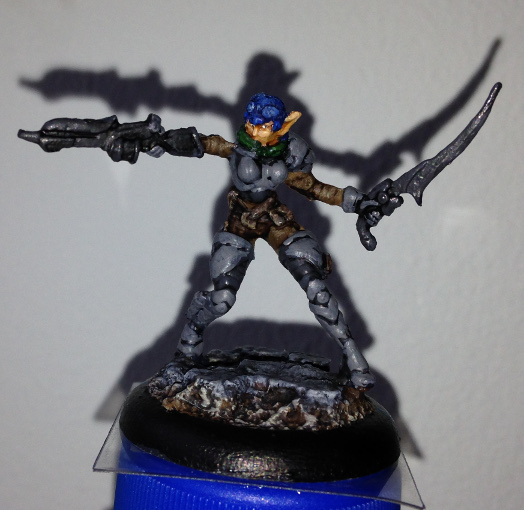
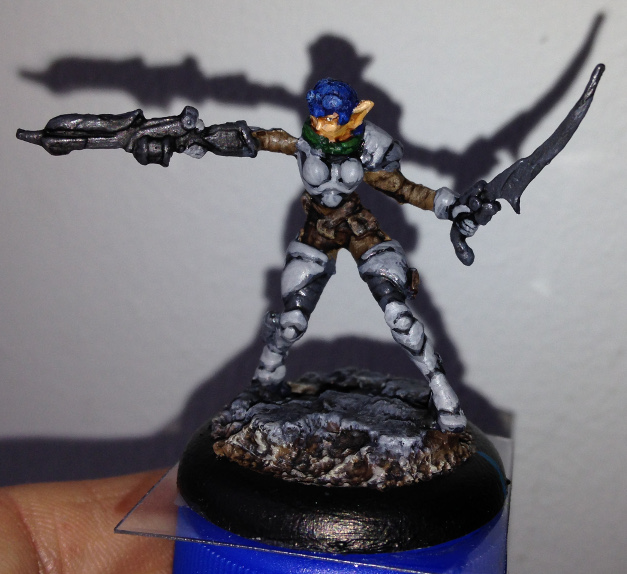
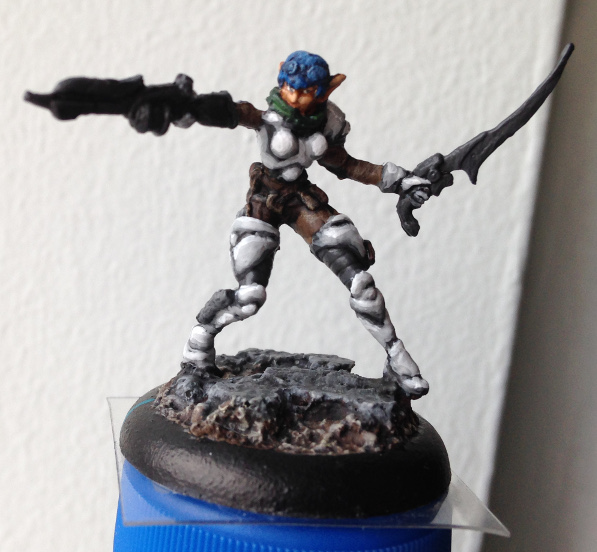
Done
Well, that’s it all done. Total time painting was probably about 7 hours, and I thought most of it ended up not too bad (that is, not much worse than my usual efforts), other than the horrid layering on the armour. I still can’t paint faces. Have some pictures of the model with the cloak glued on to finish with (these are the second set of ‘finished’ I took, as I realised while looking at the first set I’d damaged the chest armour while gripping the front and back to squeeze the cloak in; some irritated touch-up followed):